Appearance
Spring-AMQP是Spring框架的AMQP消息解决方案,提供模板化的发送和接收消息的抽象层,提供基于消息驱动的POJO的消息监听等。
- 提供不依赖于任何特定的AMQP代理实现或客户端库通用的抽象,最终用户代码将很容易实现更易替换、添加和删除AMQP,因为它可以只针对抽象层来开发
- 总之就是提高我们的框架整合消息队列的效率,SpringBoot为更方便开发RabbitMQ推出了starter
- 我们使用 spring-boot-starter-amqp 进行开发
在SpringBoot项目中添加依赖:
xml
<!--引入AMQP-->
<dependency>
    <groupId>org.springframework.boot</groupId>
    <artifactId>spring-boot-starter-amqp</artifactId>
</dependency>
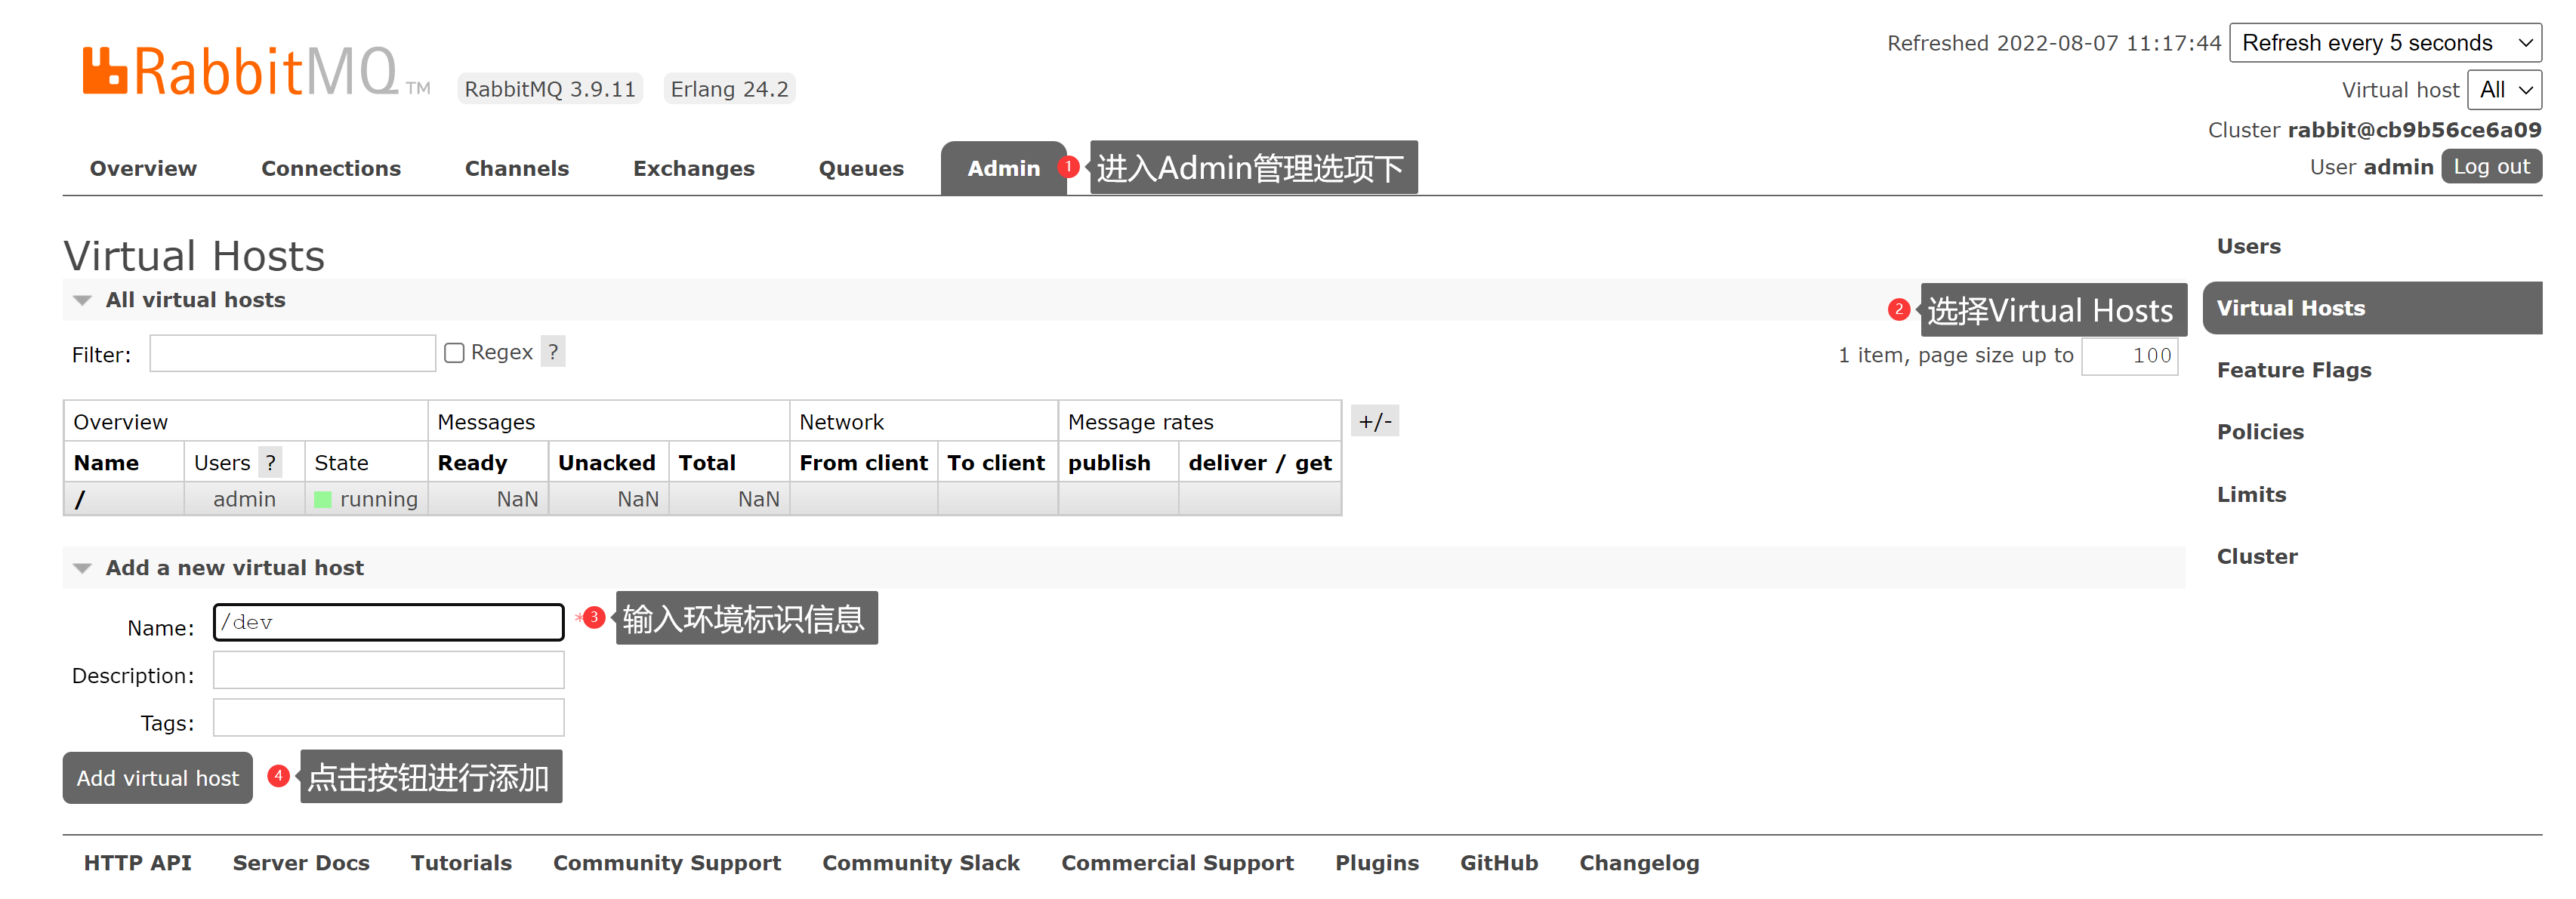
web管控台添加虚拟主机
我们在同一个项目中,可能会出现开发、测试包括上线用的都是同一个消息队列,如果不进行隔离,很可能会出现开发环境不小心把线上环境的消息进行消费了,因此添加虚拟主机,达到一个消息隔离的效果。

SpringBoot配置RabbitMQ
在application.yml中进行配置
yaml
spring:
  rabbitmq:
    host: 1.5.1.26
    port: 5672
    virtual-host: /dev #这是我上面添加的虚拟主机
    password: password
    username: admin
创建配置类RabbitMQConfig
首先定义交换机和队列的名称,然后使用Bean注入的方式,注入交换机和队列对象,最后再绑定二者关系,注意导包
java
package com.xk857.config;

import org.springframework.amqp.core.*;
import org.springframework.context.annotation.Bean;
import org.springframework.context.annotation.Configuration;

/**
 * @author cv大魔王
 * @version 1.0
 * @description
 * @date 2022/8/7
 */
@Configuration
public class RabbitMQConfig {

    /**
     * 交换机名称
     */
    public static final String EXCHANGE_NAME = "order_exchange";

    /**
     * 队列名称
     */
    public static final String QUEUE = "order_queue";


    @Bean
    public Exchange orderExchange() {
        // 创建交换机,durable代表持久化,使用Bean注入
        return ExchangeBuilder.topicExchange(EXCHANGE_NAME).durable(true).build();
    }

    @Bean
    public Queue orderQueue() {
        // 创建队列,使用Bean注入
        return QueueBuilder.durable(QUEUE).build();
    }

    /**
     * 交换机和队列绑定关系
     * @param queue 上面注入的队列Bean,如果你的项目又多个,记得给Bean取名字
     * @param exchange 上面注入的交换机Bean
     */
    @Bean
    public Binding orderBinding(Queue queue, Exchange exchange) {
        return BindingBuilder.bind(queue).to(exchange).with("order.#").noargs();
    }

}